Rotor Bolts

S1000RR  FORUM

Help Support S1000RR FORUM:

This site may earn a commission from merchant affiliate links, including eBay, Amazon, and others.

RickS1K

Well-known member
S1000RR Supporter
Joined
Sep 18, 2012
Messages
948
Reaction score
24
Location
Surrey
I need to replace my rotors as they've done 20k miles. I know most manufacturers say the bolts have to be changed every time you remove them. I've had them off once when I had a ding on the wheel repaired, and I reused them. The bolts look OK to me - is that enough, or should I change them this time?

Cheers

R
 
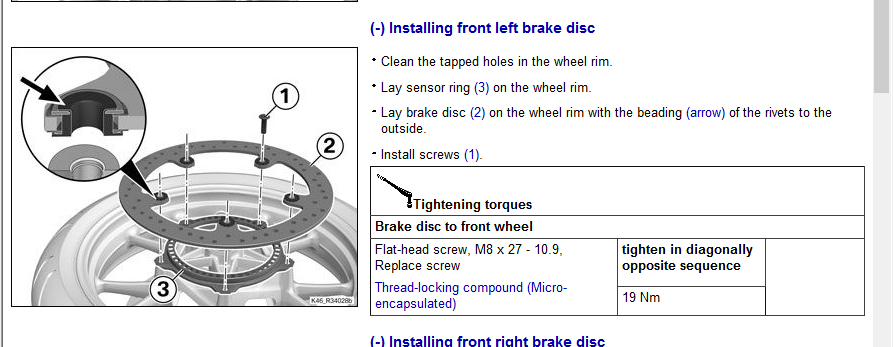
The manual say, change them. What I dis is bought a set of titanium bolts and reuse them with proper torque and thread lock.

bmw10.png
 
The reason they tell you to replace them is the dry thread lock only works once. There?s nothing wrong with the bolts themselves being used again and again if you apply your own thread lock.
 
I need to replace my rotors as they've done 20k miles. I know most manufacturers say the bolts have to be changed every time you remove them. I've had them off once when I had a ding on the wheel repaired, and I reused them. The bolts look OK to me - is that enough, or should I change them this time?

Cheers

R

Be careful, the disks/rotors experience significant heat cycles and with the threadlock the bolts might be tough to start to undo them. Ensure you have cleaned the bolt heads and that the tool you use has crisp edges. Keep everything straight and consider using a breaker bar to extend the torque on the tool and turn it gently to start it off. Also consider lifting the wheel rims onto long flat blocks of wood so you don't damage the wheel edges or a new disk/rotor when you fit the new ones. I speak from experience trying to remove some disks/rotors from another bike, had to drill out a couple of the bolts which I had rounded.
 
Undoing any bolt .... heat, heat and more heat around the area the bolt goes into. Hot air gun better than naked flame.

.... and this will sound strange but partly do the bolt up little tighter as this will most likely break any corrosion instead of snapping the bolt, then undo.

As Mr Smooth says make sure the tool fits. If the allen head is loose, use a bit of valve grinding paste in the bolt head to take up any play. They used to even do that on Concorde.
 
So after reading all this and inspecting my rotor bolts I decided that I would replace them after all. I took them out last night (using a heat gun, cheers JamieMac) and they all came out without any issue whatsoever. Tonight I tried to fit the new rotors and new bolts and there's a problem. 9 bolts go in no problem at all, and one doesn't. I get it halfway down, then it doesn't feel like it wants to go any further. I didn't force it, just took it out and tried a few things:
1. Cleaned the screwhole with wd40 and a cotton bud to clear out any debris I missed last night
2. Tried different bolts - new and old - everything stops in the same place..

So, it feels like it has cross threaded... I don't want to force it down....

Thoughts?
 
Last edited:
Run a ?tap? of the correct size down the thread in the wheel to clean out the thread. A tap and die set is cheap and worth having. J
 
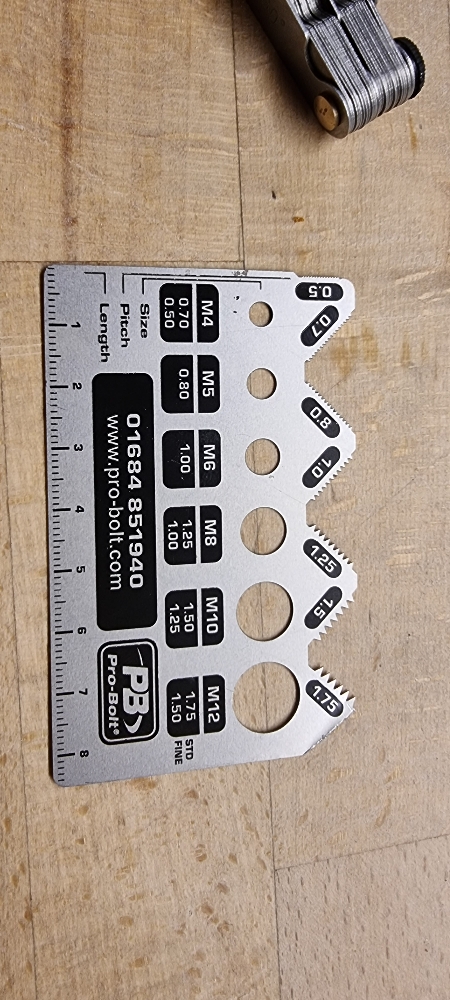
Check the pitch as well. An M8 bolt can like all bolts have multiple pitch. Probolt do a hand bolt tool which allows you to check size, pitch, length.
 
If it?s the thread pitch on the bolt you would identify it after trying different bolts from the new batch. Have you done this?
It the batch of bolts thread was wrong then the same issue would be seen in other holes.

Overlay a new and old bolt the threads should interlock. If they done thread is different.
Also measure bolt shoulder.

Try the new bolts with an old disc. If it works it?s the disc hole dia or hole pitch.
If it?s the same retap the holes gently.

Couple of things, did you run down all bolts fully as you assembled or partially assembled / left loose before adding the final bolt?
Is the issue common on both discs?


Sent from my iPhone using Tapatalk
 
I had a smilar issue with mine when I changed rotors. Turned out to be old threadlock in the hole that hadn't been cleaned out first time.

I didnt use any heat - if you have don the threadlock may be baked on, but should cut away with a thread tap.

As Paul says it is is important to tighten all bolts equally as you fit.

Very easy to chew the heads on these bolts.
 
Last edited:
Thanks for the thoughts gents. I was able to locate and hand tighten both old and new bolts into 9 of the 10 holes. I had already confirmed that the new bolts had the same length/pitch/width as the old ones. I went looking for thread lock stuck in the holes in the morning light. However, what I actually found was that the screw only goes in at an angle because there appears to be damage near the top of the wheel thread - I didn't notice that with all the bushes and disc in the way last night. Not sure how it got the damage, but hey... Whilst I would normally look forward to learning something new and tapping it myself, I've spent a lot of time and money on new tools over the winter and now that we have the opportunity to use our bikes more I just wanted it done. Lazy or what :)

So I called my local garage, and they recommended a local engineering company, who said they could do it today... so they have the wheel. Just waiting on them calling to say it's done.
 
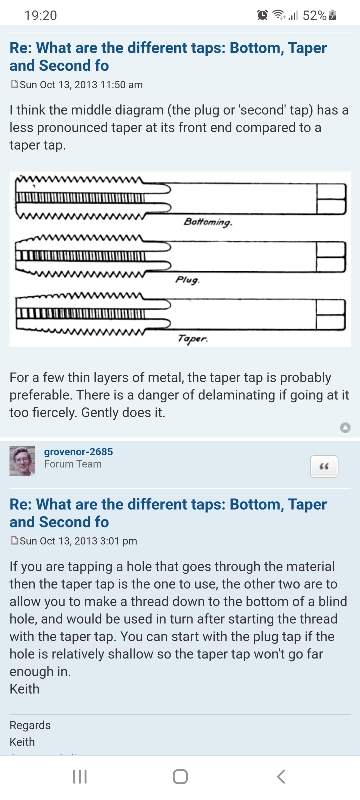
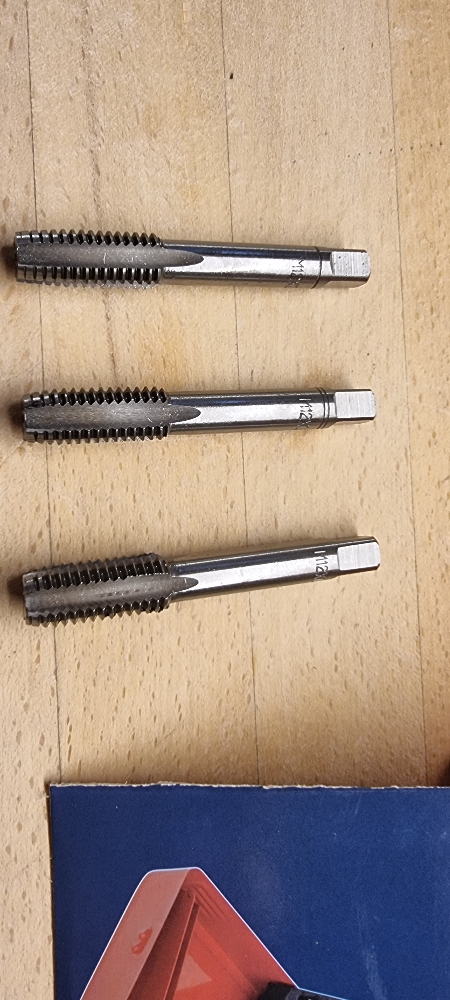
Good advice from the guys and worth noting for the next person...cutting or cleaning up a thread in a blind hole correctly requires a bottoming tap...there is a difference if you look closely..

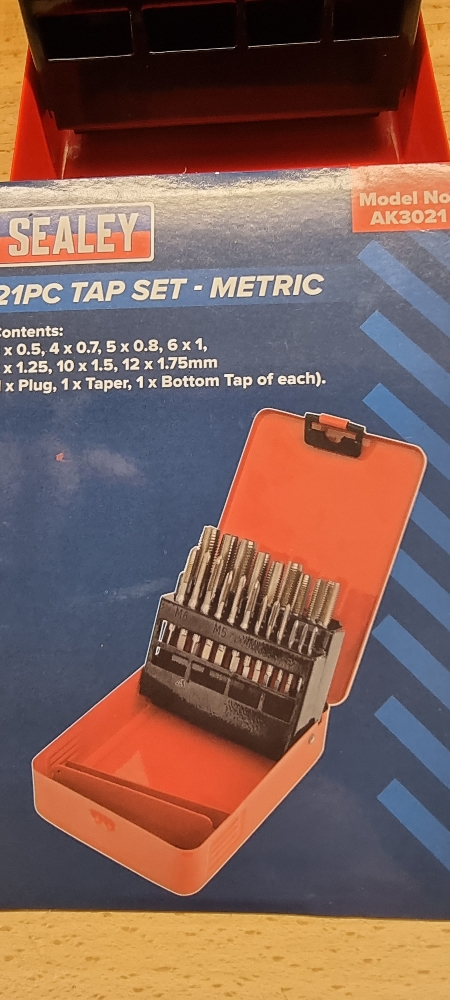
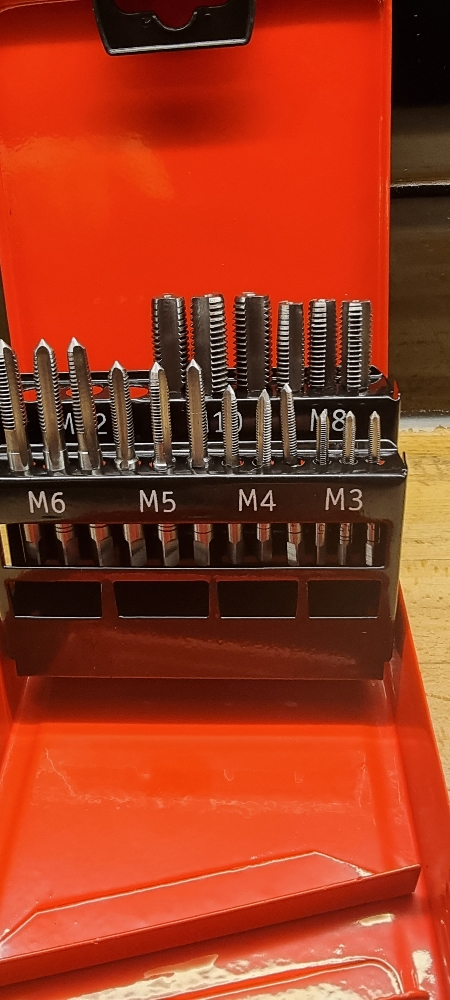
You can buy these on an individual basis or as a set like mine..not expensive but covers what an average bike owner would need and are indispensable in my opinion...

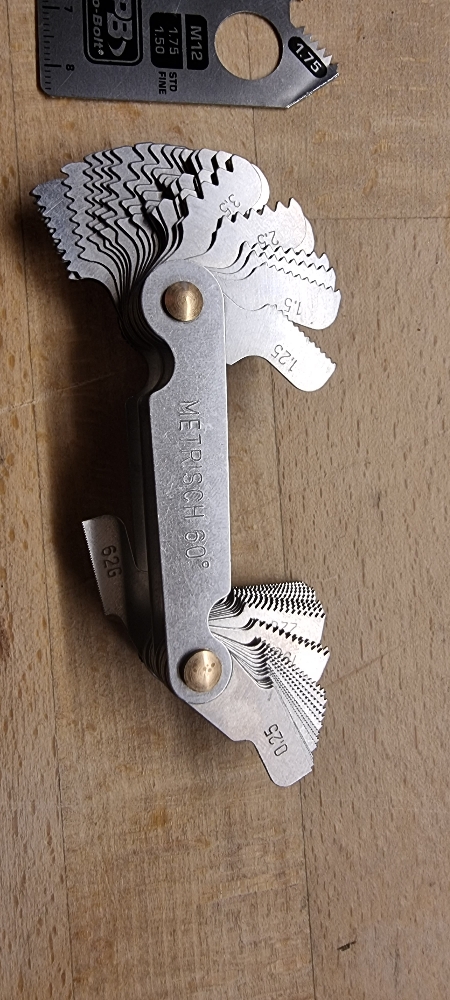
A thread Gauge is also essential, Pro Bolts is OK but a set like this is better when your eyesight is crap like mine..

32 quid sorts 95% of the likely problems most of us will encounter..

To put things into perspective a really good quality set of engineering taps and dies in high speed from the likes of Presto or Faithfull will set you back at least a grand, most of the cheap ones will be Carbon Steel and not HSS .

https://www.amazon.co.uk/dp/B01M4JUTDJ/ref=cm_sw_r_cp_apa_glt_fabc_5P9P5EX7320VSP8NPNKR
a17a493b29ad7de105db653a8ee7350e.jpg
d9fbbc66e5c289a4b7a44841c0e7863b.jpg
257df13e761551c74a34fe52ed3b34be.jpg
1c9cf176740298e5d6de720681bc374e.jpg
760c0754b23dbe0b6dbe0fab1cad66af.jpg
a7ab8cf731eebbb7e8faf8f970d31a1f.jpg


Sent from my SM-G998B using Tapatalk
 
Last edited:
On another day I might have spent that ?32 and spent the rainy weekend working out how to use them. As it was it only cost a fiver to have the damage by someone who actually knew what they were doing (Cranford Engineering, Ashtead). They describe themselves as a machine shop if you need to google something in your area.

Best of all, there was a chippy near the shop that did a cracking bag of chips. Of course, that all meant that by Friday I had the bike back together - just in time to be unusable cos of the torrential rain we had all weekend.... que sera
 

Latest posts

Back
Top