
I thought it might help someone one day if I did a post on this. It's only the second time I've done it and like most things it's easy when you know how. So it's a bit beginner 'ish' sorry.
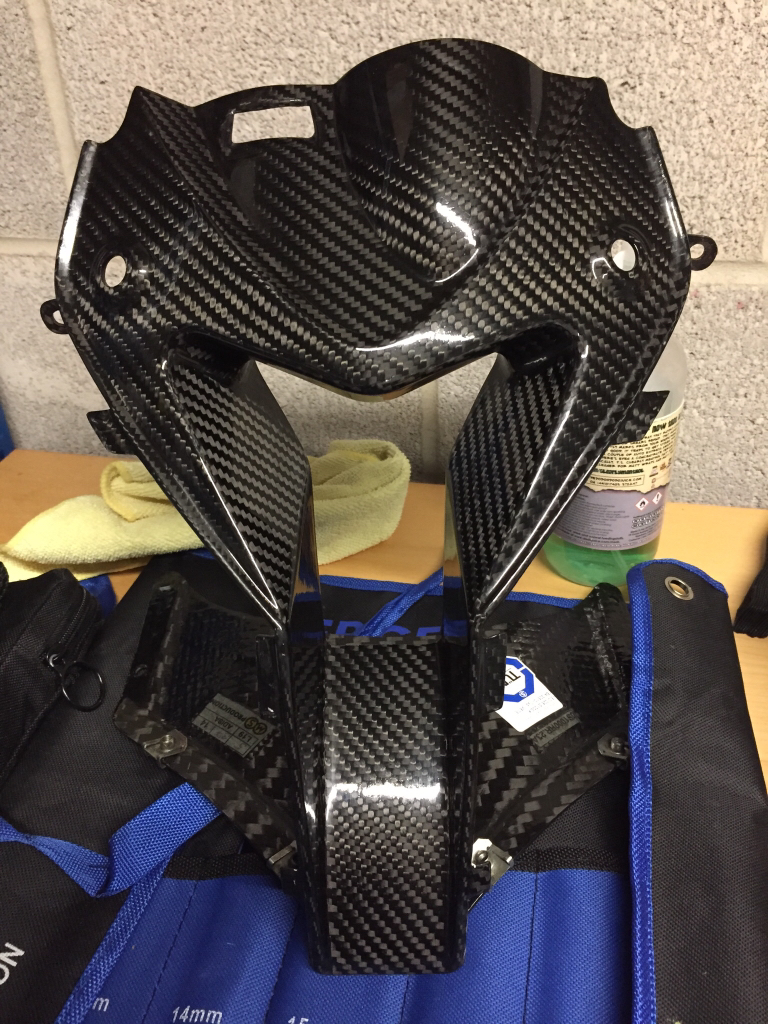
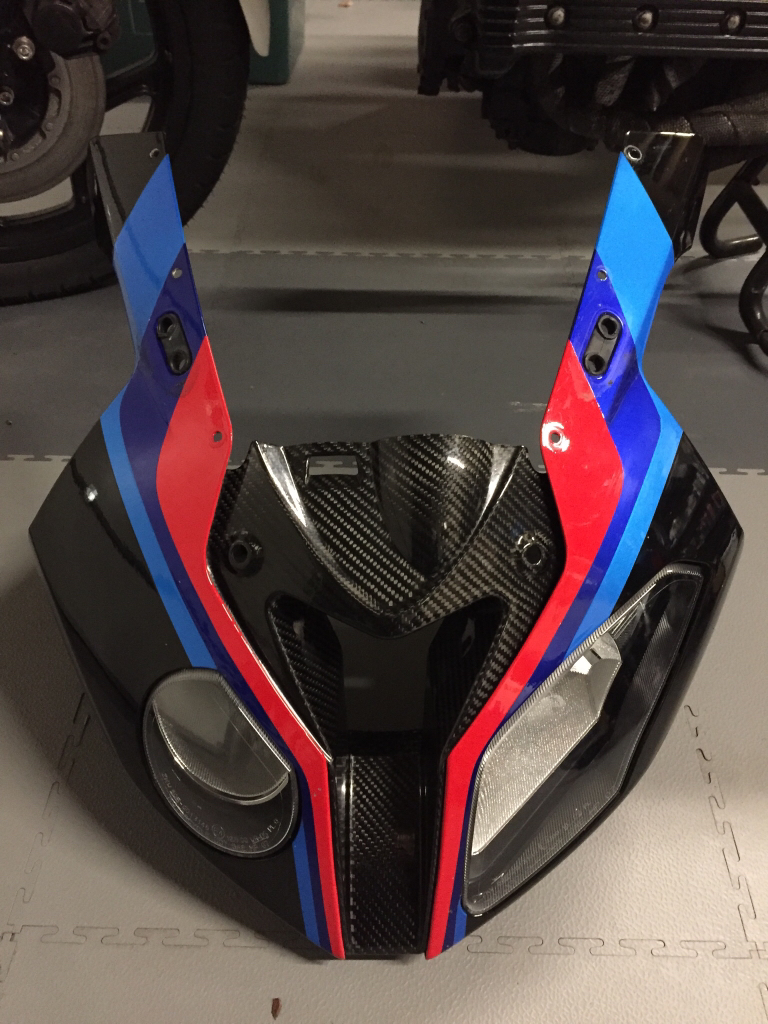
First off the new shiny nose piece thanks to Alex's misfortune with his previous bike:
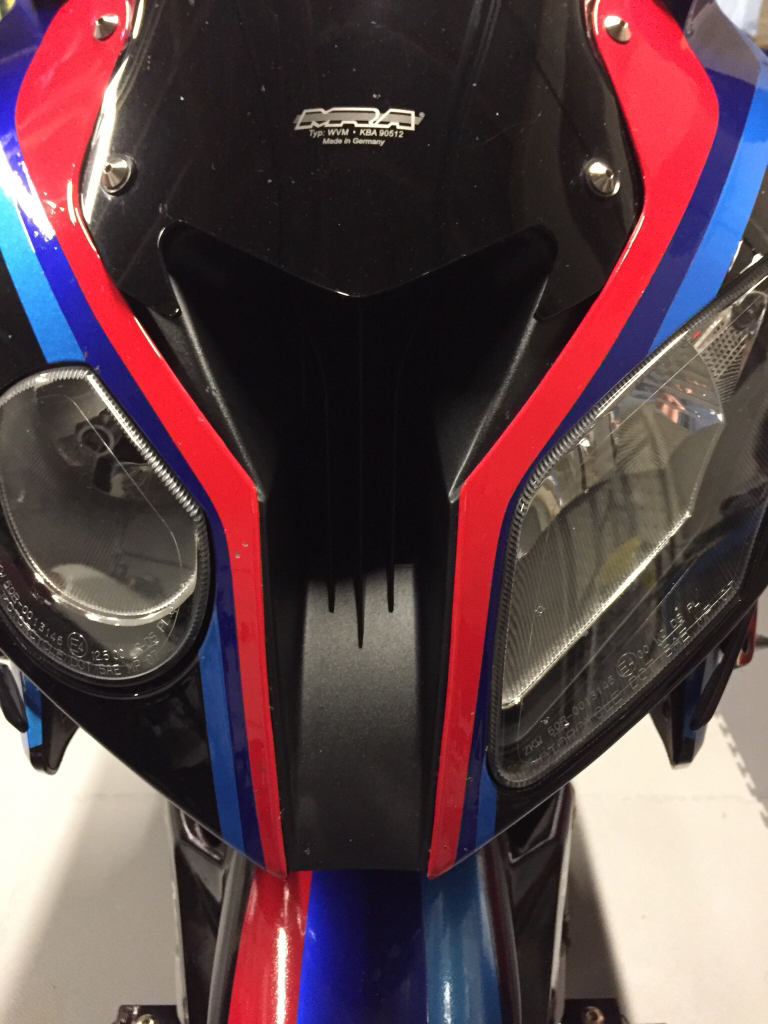
It's going to go in between the lights:
Remove the rear view mirrors or blanking plates.
Take off the side winglets.
Unscrew the joining piece of fairing directly below the bar ends, the piece that holds the front fairing to the side fairing via the infill panels.
Unplug the lights (2 plugs) - squeeze the retaining clip and pull the plugs out.
Remove 4 screws from around the lights that go through the front frame piece into the light housing. 2 either side - I should have taken a pic but they are obvious.
I took the mra screen off but I think you can get away without doing it.
Unscrew the 4 farthest fairing screws behind the front wheel that go up towards the bars, 2 each side.
Unscrew the 2 screws - 1 each side - that point out from the front inner section of the fairings.
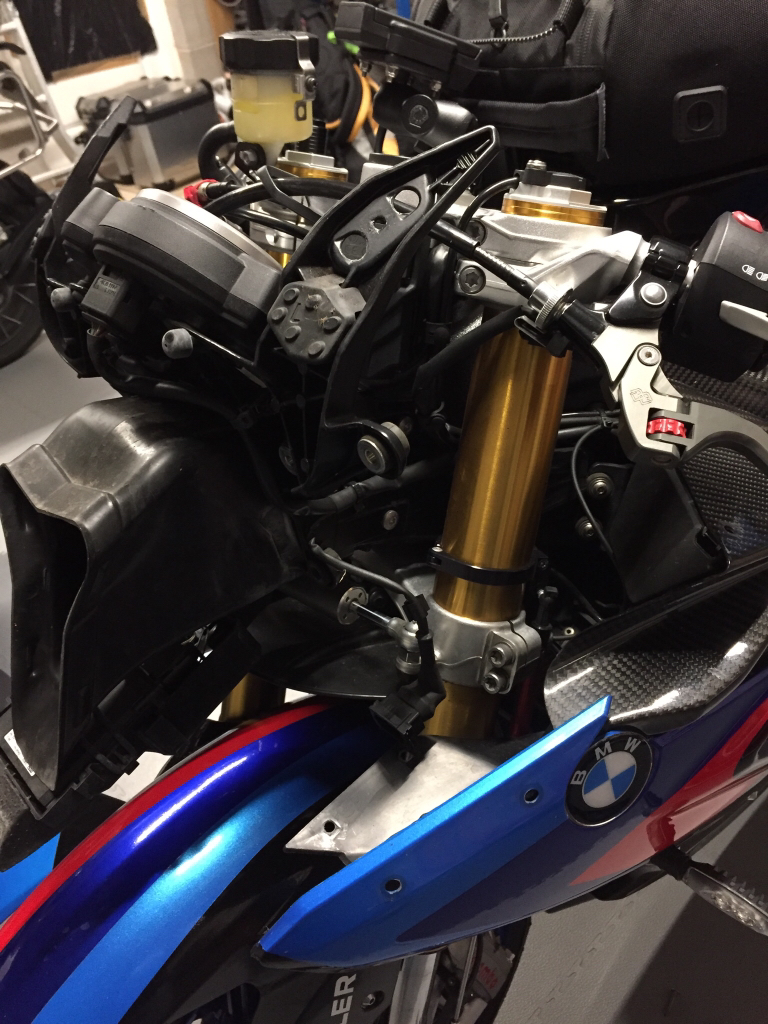
Carefully remove the front section by pulling it forwards. It's like the side fairing panels in that it needs that initial pull to get it off the rubber grommet style fixings. The front fairings will have enough give to allow the unit through if the front screws have been removed as above. It should then look something like this:

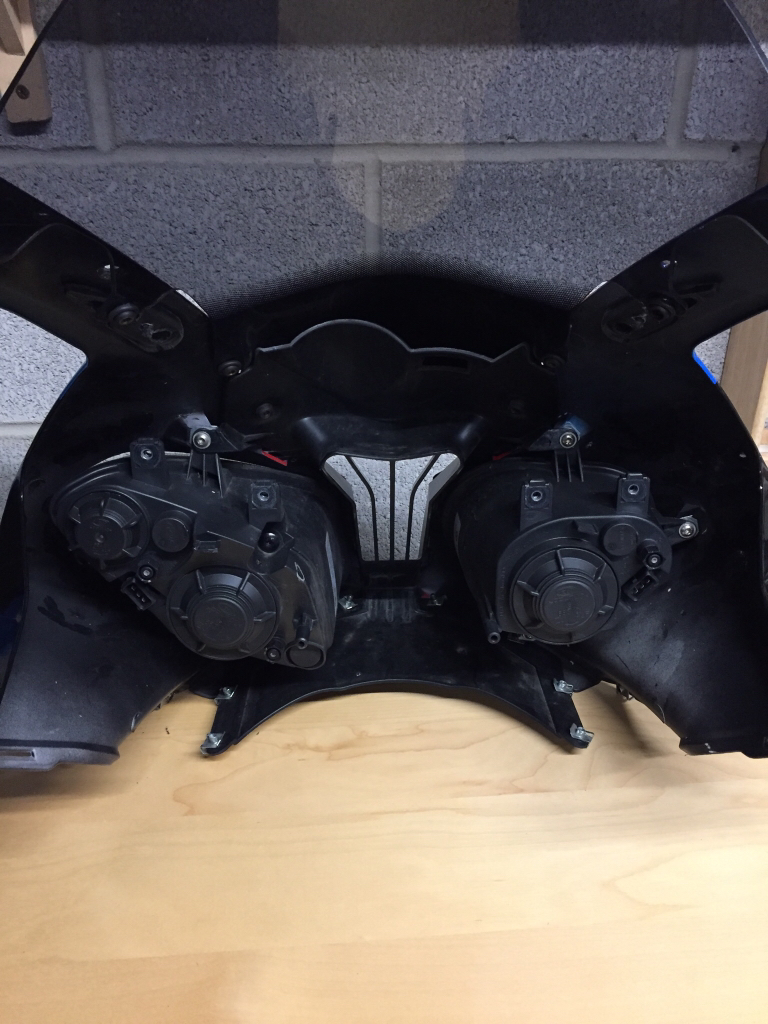
And this:
The nose piece is changed by removing the 2 screws either side plus the one screw above each light, and then (in my case) wrestling with it for a bit to get it decoupled from the fairings. New one goes on:

Repeat:
I then start putting it all back together.
I do all my fairing stuff at 3nm, I think the BMW workshop spec is 2nm but I use ti fasteners so a little bit more than the standard oe ali screws.
The mirror bolts are 8nm.
Windscreen screws are 1nm.
Top screw above headlight to fairing piece 2.4nm
I have over tightened too many bolts in the past to take any chances.
The one thing about the bike that really pisses me off are the 4 spacers for the winglets.

They fall out easily, into the belly pan, that's once I've tracked it down. Extracting one of those from inside the HP4 belly pan tests my patience to the extreme. Anyway, job done.
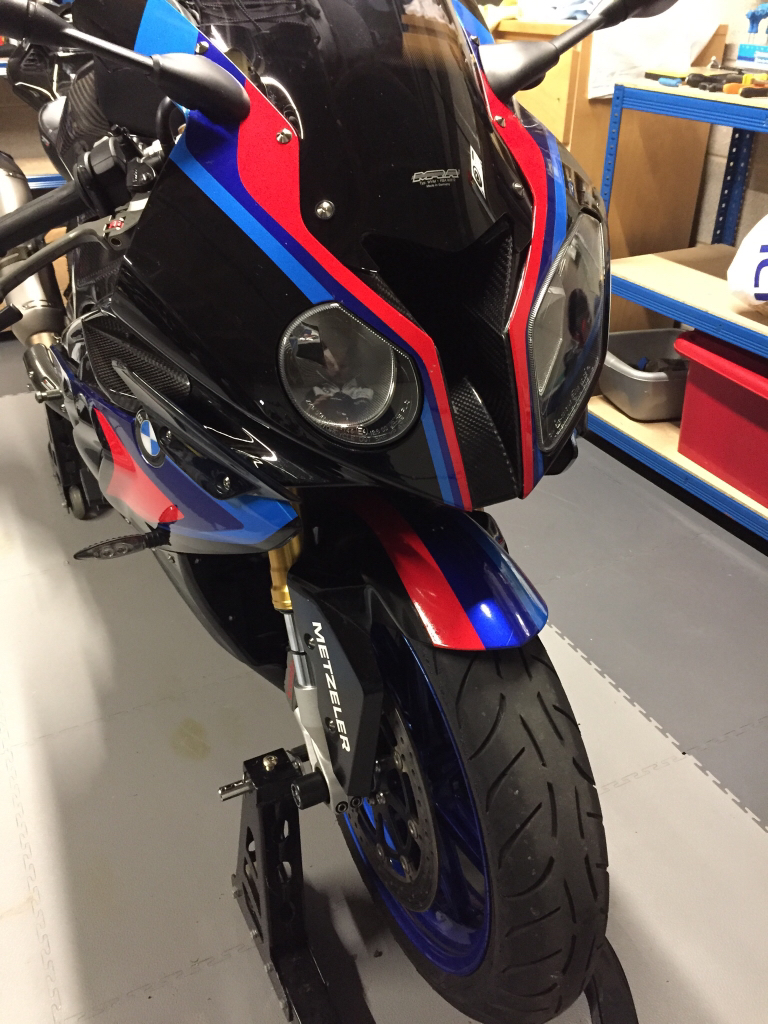
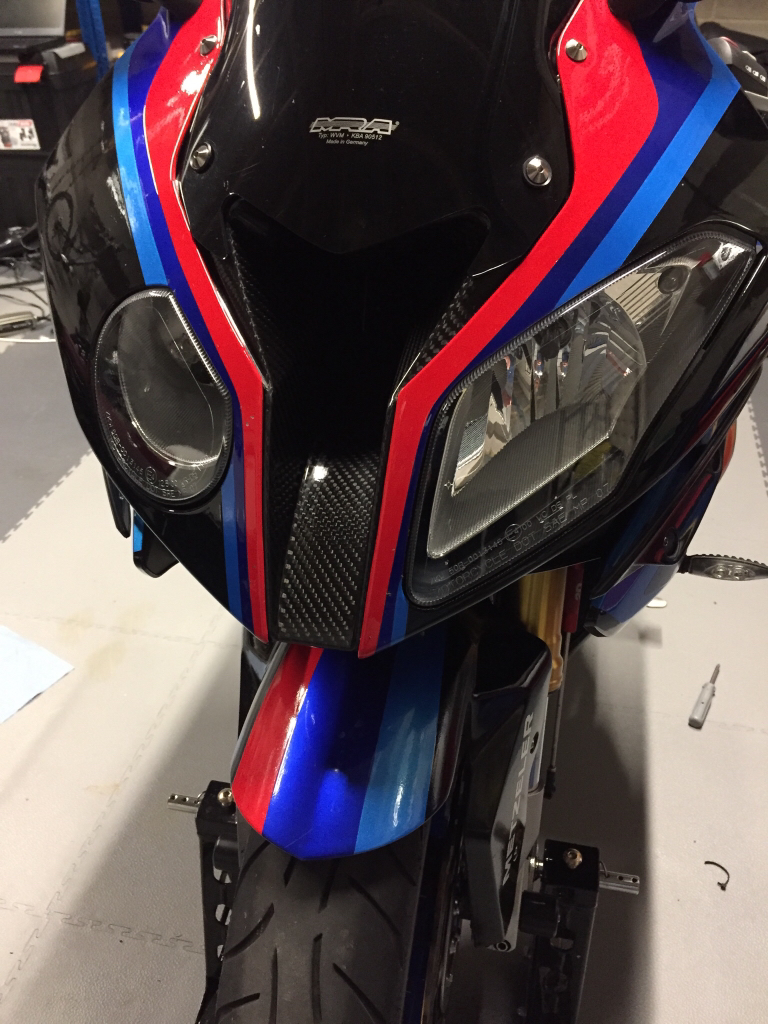
I'm pleasantly more than surprised at the difference it makes aesthetically. Bike is finished now.,. Paint job now looks a bit tired.
First off the new shiny nose piece thanks to Alex's misfortune with his previous bike:
It's going to go in between the lights:
Remove the rear view mirrors or blanking plates.
Take off the side winglets.
Unscrew the joining piece of fairing directly below the bar ends, the piece that holds the front fairing to the side fairing via the infill panels.
Unplug the lights (2 plugs) - squeeze the retaining clip and pull the plugs out.
Remove 4 screws from around the lights that go through the front frame piece into the light housing. 2 either side - I should have taken a pic but they are obvious.
I took the mra screen off but I think you can get away without doing it.
Unscrew the 4 farthest fairing screws behind the front wheel that go up towards the bars, 2 each side.
Unscrew the 2 screws - 1 each side - that point out from the front inner section of the fairings.
Carefully remove the front section by pulling it forwards. It's like the side fairing panels in that it needs that initial pull to get it off the rubber grommet style fixings. The front fairings will have enough give to allow the unit through if the front screws have been removed as above. It should then look something like this:
And this:
The nose piece is changed by removing the 2 screws either side plus the one screw above each light, and then (in my case) wrestling with it for a bit to get it decoupled from the fairings. New one goes on:
Repeat:
I then start putting it all back together.
I do all my fairing stuff at 3nm, I think the BMW workshop spec is 2nm but I use ti fasteners so a little bit more than the standard oe ali screws.
The mirror bolts are 8nm.
Windscreen screws are 1nm.
Top screw above headlight to fairing piece 2.4nm
I have over tightened too many bolts in the past to take any chances.
The one thing about the bike that really pisses me off are the 4 spacers for the winglets.
They fall out easily, into the belly pan, that's once I've tracked it down. Extracting one of those from inside the HP4 belly pan tests my patience to the extreme. Anyway, job done.
I'm pleasantly more than surprised at the difference it makes aesthetically. Bike is finished now.,. Paint job now looks a bit tired.
Last edited: